

GitFolio
Learn how to create a React application using the REST API to display user profiles and repositories, as well as search for any GitHub repository.

GitFolio is a web-based application that displays my GitHub portfolio and repositories. The app has been updated with a new feature that allows users to 'Search for any GitHub repository' with usernames.
This was one of three projects in the second-semester examination project for the AltSchool Africa School of Engineering.
Content
Introduction
The Challenge
Preview
- Links
Development
Built with
Dependencies
Process
Components
My Profile
Setup Routes
My Portfolio
Pagination
Advanced feature
Conclusion
Introduction
GitFolio is an easy-to-use app that displays my GitHub profile and a list of all my public repositories available on GitHub.
Users can also search for their own GitHub Repositories or any other repository available on GitHub in the app using GitHub usernames.
In this article, I'm assuming you're familiar with JavaScript and React fundamentals.
The Challenge
Implement an API fetch of your GitHub portfolio, show a page with a list of all your repositories on GitHub (the page should implement pagination for the repository list), and create another page showing data for a single repository clicked from the list of repositories.
Added Feature(Holiday Challenge)
- Improve an existing feature or add a new one.
Preview
Links:
Development
Built With:
HTML
CSS
ReactJs
Dependencies
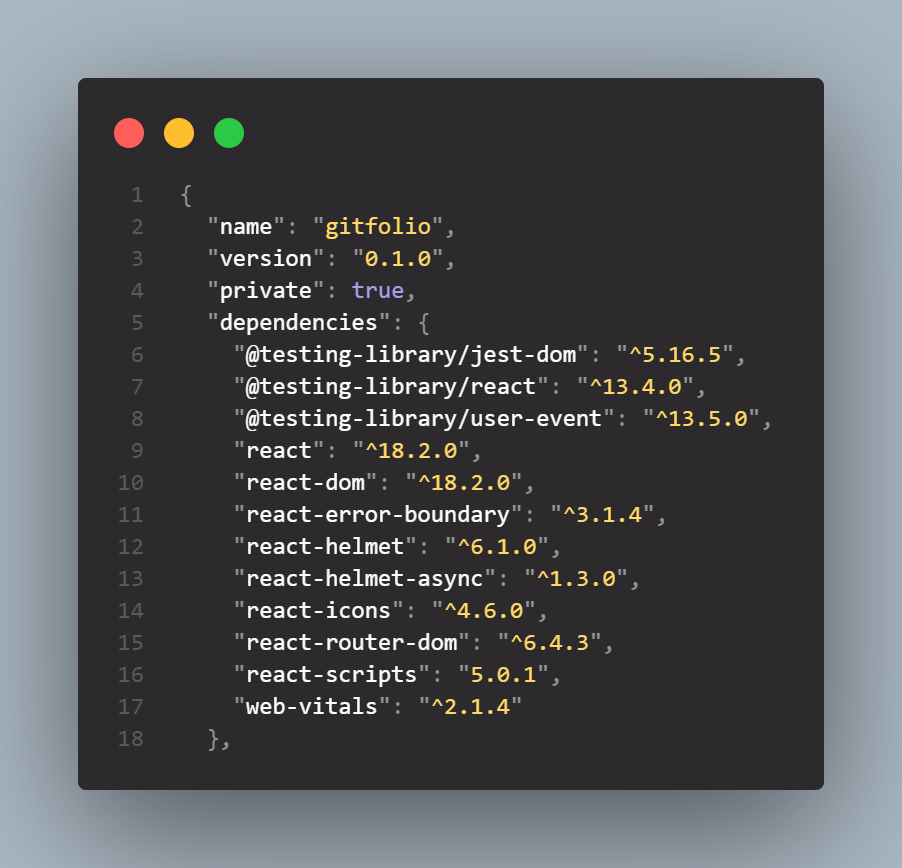
The following technologies (website-building tools) were used in the app's development: React, react-dom, react-router-dom, react-error-boundary, react-helmet, and react-icons.
The complete list can be found in the image below.
Process
I scaffolded the project with create-react-app by running the npx create-react-app gitfolio command on my terminal. create-react-app will install both react and react-dom libraries.
npx create-react-app gitfolio
Components
To arrange my work properly, I created another folder called components in the src folder, then created an index.js file in the components folder to re-export the components.
My Profile
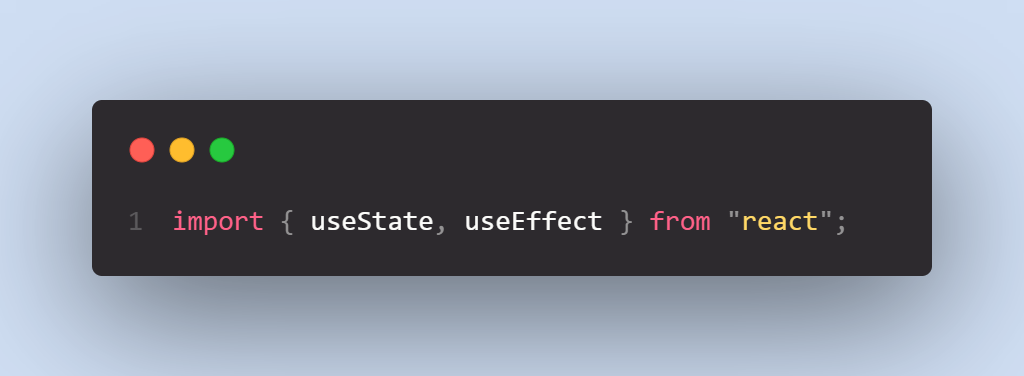
In the components folder, I created a file called home.jsx. Then, within the file, I created the 'Home component'. I imported react useState and useEffecthooks into the file. The useState and useEffect hooks will be used to manage the states in the app.
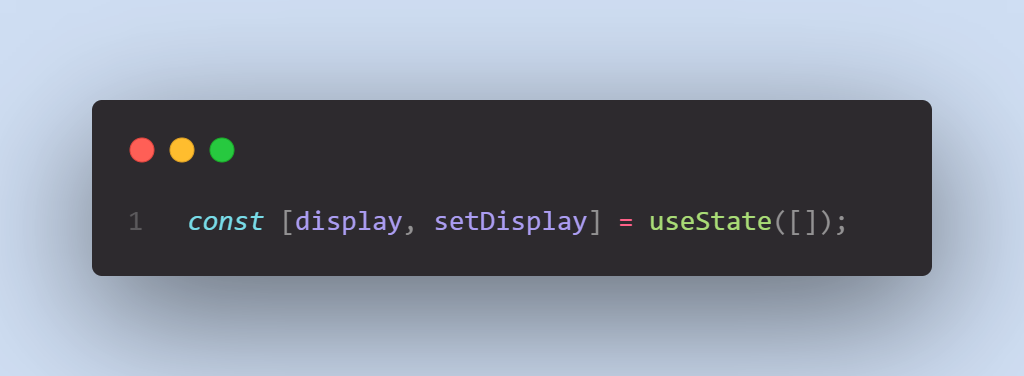
To get my GitHub profile from the 'GitHub API', I used the useState hook to create a state variable called display and set it to an empty array which I will use to store the data to be fetched from the API.
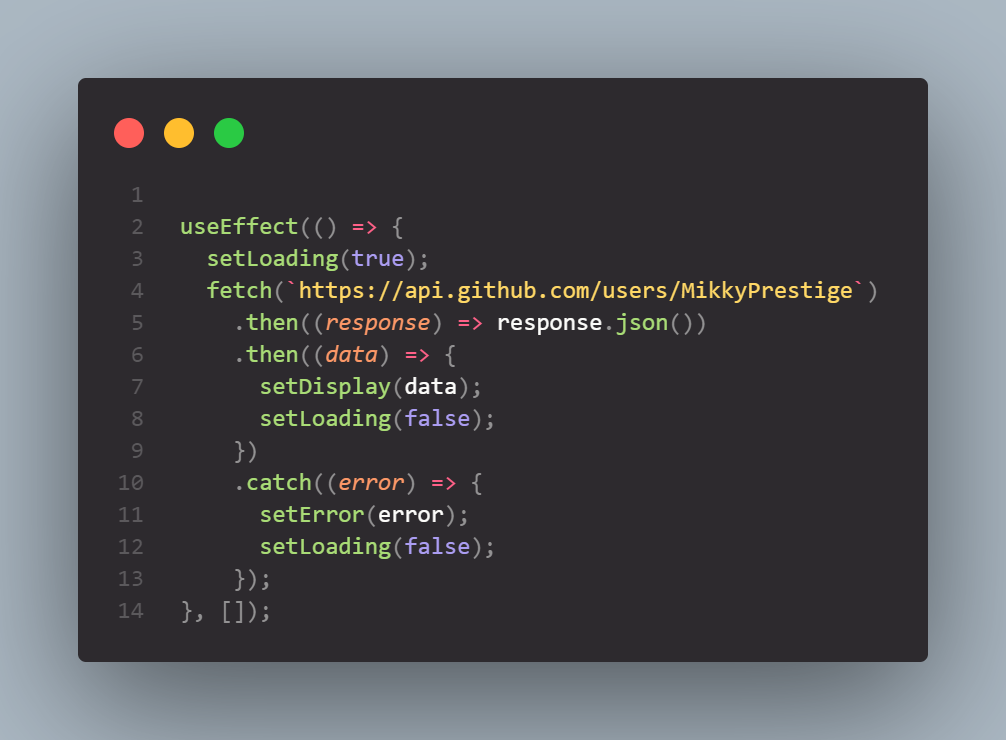
The useEffect hook was used to integrate the GitHub API. I used the fetch method within this hook to retrieve my data from the GitHub API using the URL from the 'GitHub REST API documentation' and my GitHub username. The returned response was used to update the display variable with the setDisplay function. I added an error variable and used the setError function to update the error message if an error occurred during the API call. I then passed an empty array to the useEffect dependency array, this ensures the app only made the fetch request once after the page is loaded.
The response from the API request that is stored in the display variable is an object, so I used the destructuring method to extract the properties. This enabled me to assign these properties to new variables with matching names. I also added a logical operator to the display variable to set the default value of all variables to an empty object if it is undefined or null. This prevents errors from being thrown when the display variable is not defined during the first iteration.
Setup Routes
React-Router is a standard routing library for React applications. I installed it on the project to allow navigation between views of the various app components as well as its nested routes.
I used the command npm install react-router-dom for the installation.
npm install react-router-dom
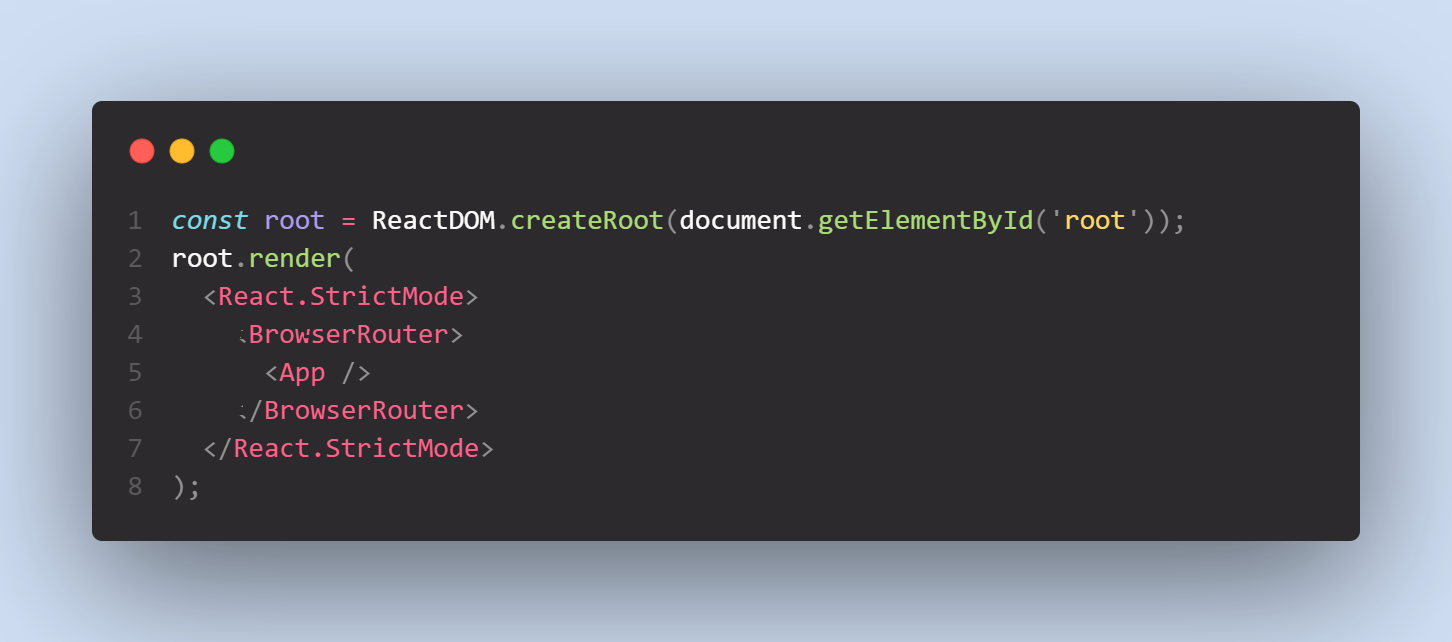
After installation, I imported BrowserRouter from react-router-dom and wrapped it around the App component in the index.js file inside the src base folder.
Then imported Route, Routes from react-router-dom into the src folder's App.jsx file.
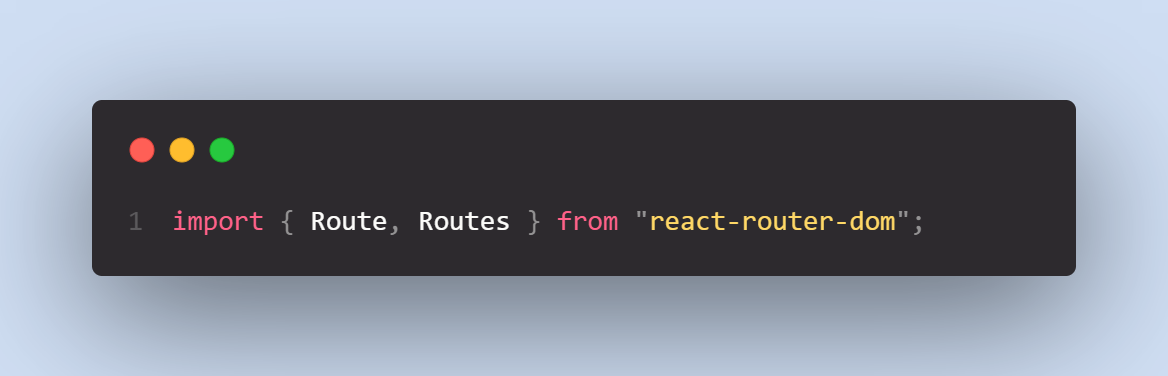
Routes are the outermost container that will wrap the other Route to render the branch that best corresponds to the current location. Each Route has path and element properties. The path specifies the component's location and the element specifies the component that will be rendered in each Route.
My Repositories
I used the Context API for passing data between the app components.
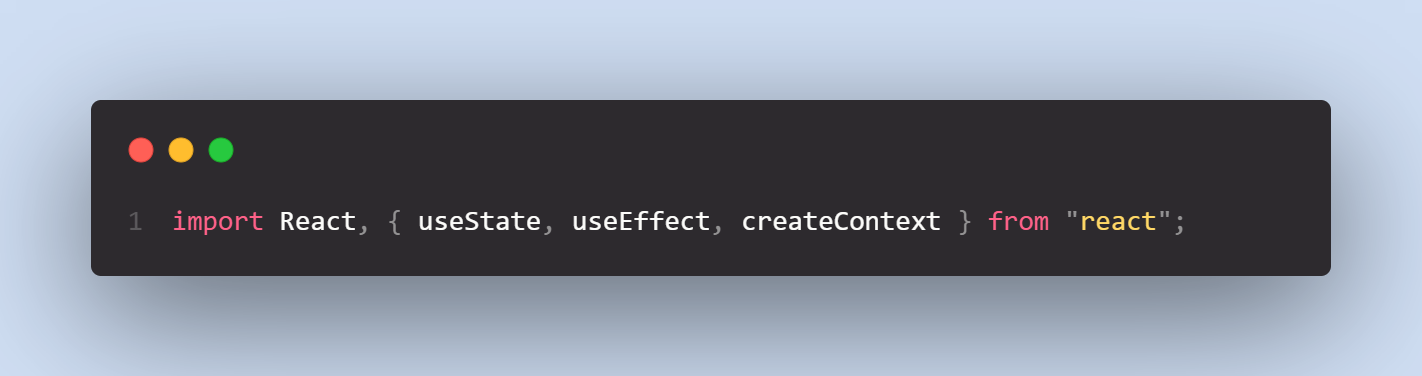
I started by creating a context.jsx file in the components folder and then import the useState, useEffect, and createContext hooks from react.
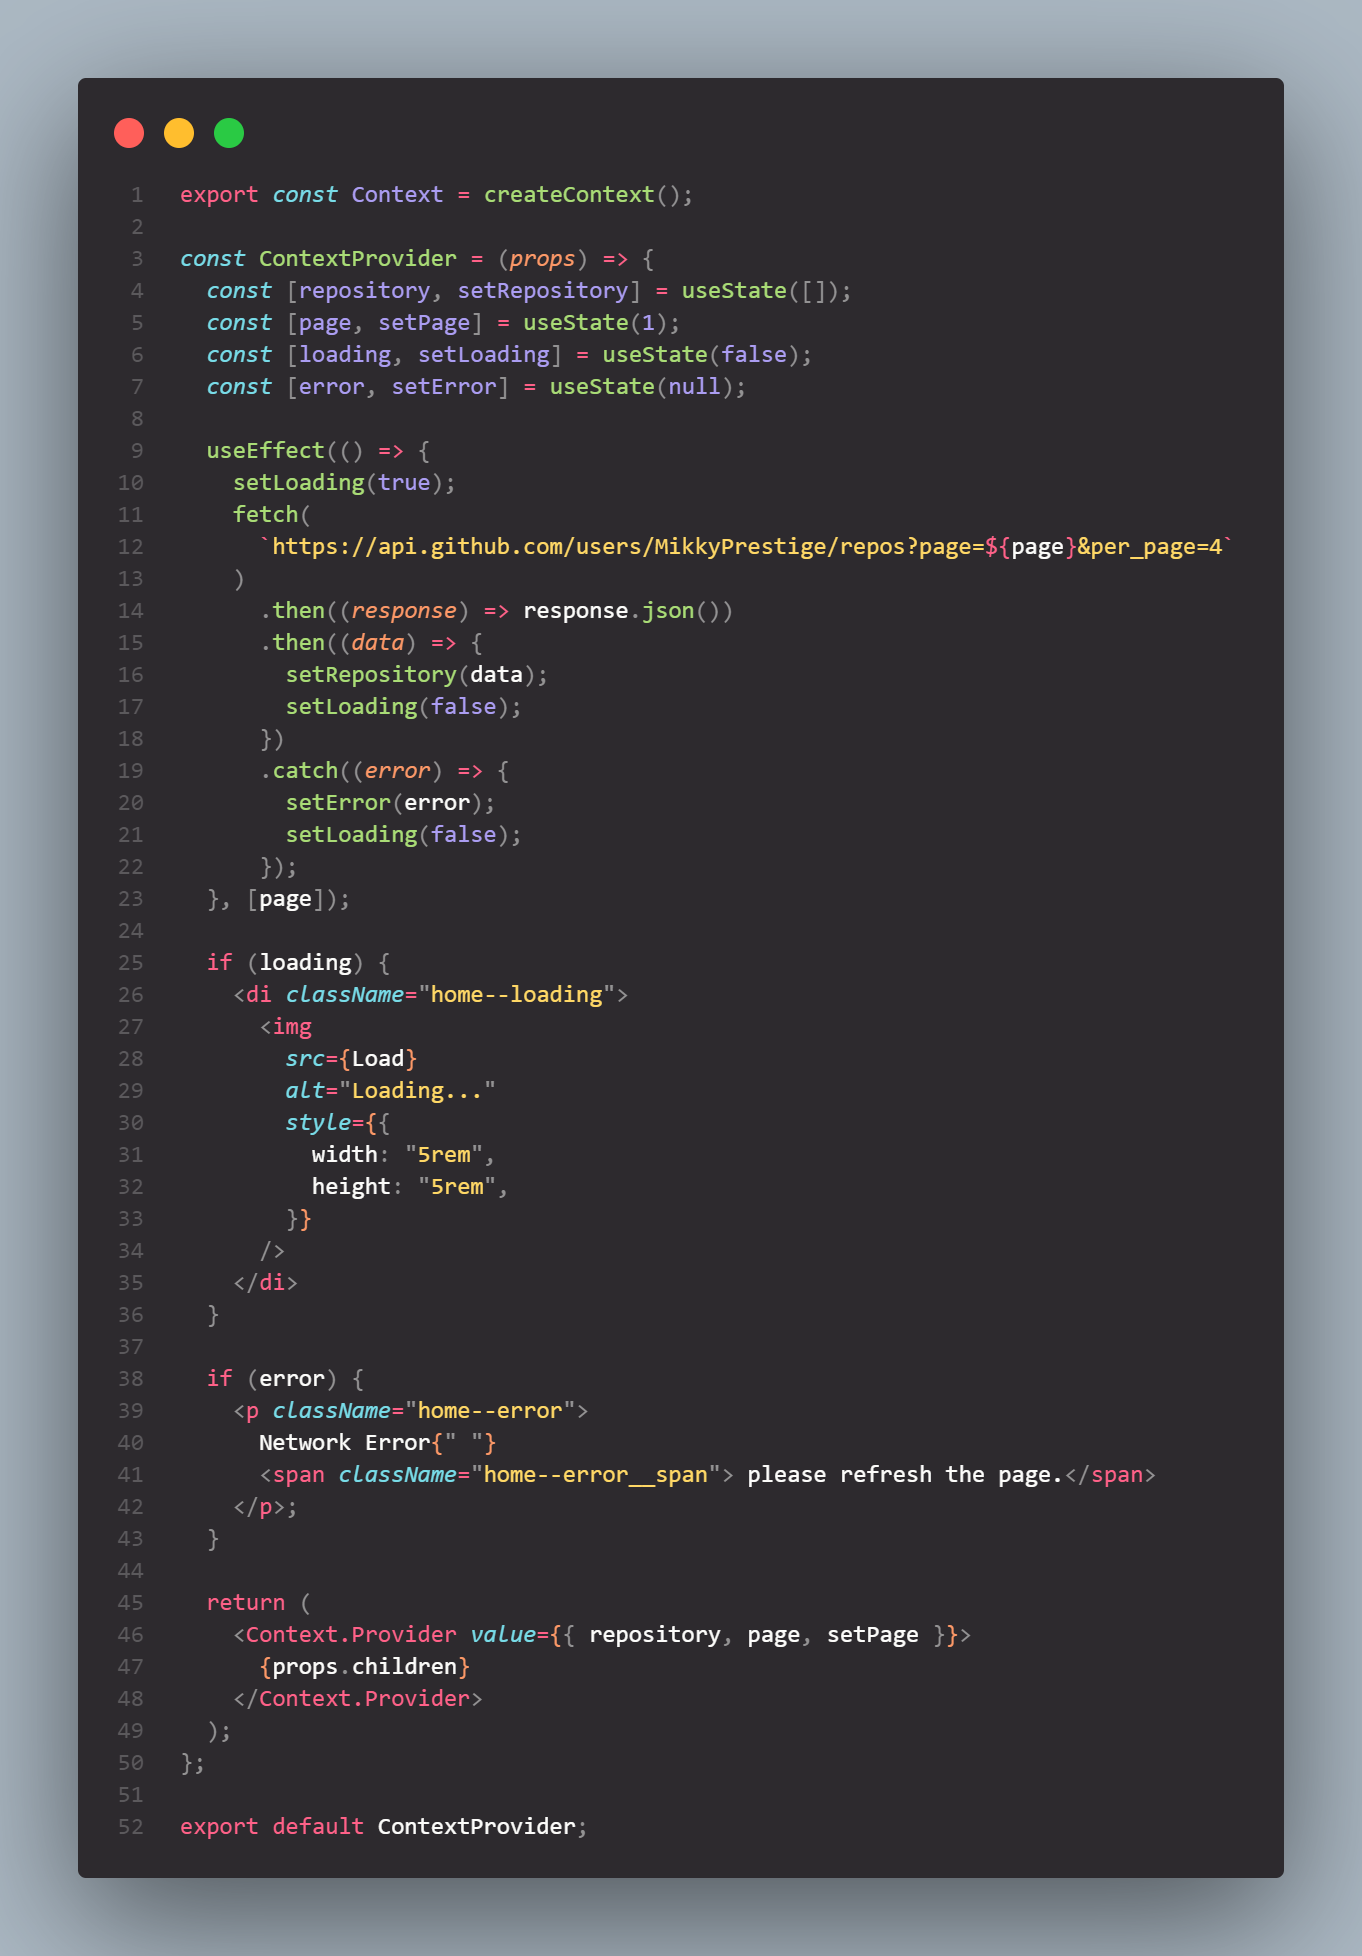
I started by using the createContext API to create a new context object, which I then exported. Following that, I created a ContextProvider component to send data from the Context to other components in the app. I used the useState hook to initialize variables such as repository, page, loading, and error. I also used the useEffect hook to make a fetch request to the GitHub API. Similarly to my previous implementation, the fetch request URL endpoint this time includes query parameters; page and per_page, which are used to get the number of pages fetched and set the number of results fetched per page, respectively. The retrieved data is then stored in the repository variable.
I also added the page variable to the dependency array, thereby making the useEffect hook to re-run the callback function whenever the page state changes. Finally, the Context.Provider component is returned, and the state variables are passed down to the children components as a value prop. This allows data sharing across multiple components within the app.
I then created a new file called repos.jsx in the components folder. Within this file, I added a functional component called Repos. This component will be used to display a list of my GitHub repositories on a page.
I imported the Context object from the context.jsx file that I had previously created. Then used the useContext hook from the React library to consume the context data provided by the ContextProvider component.
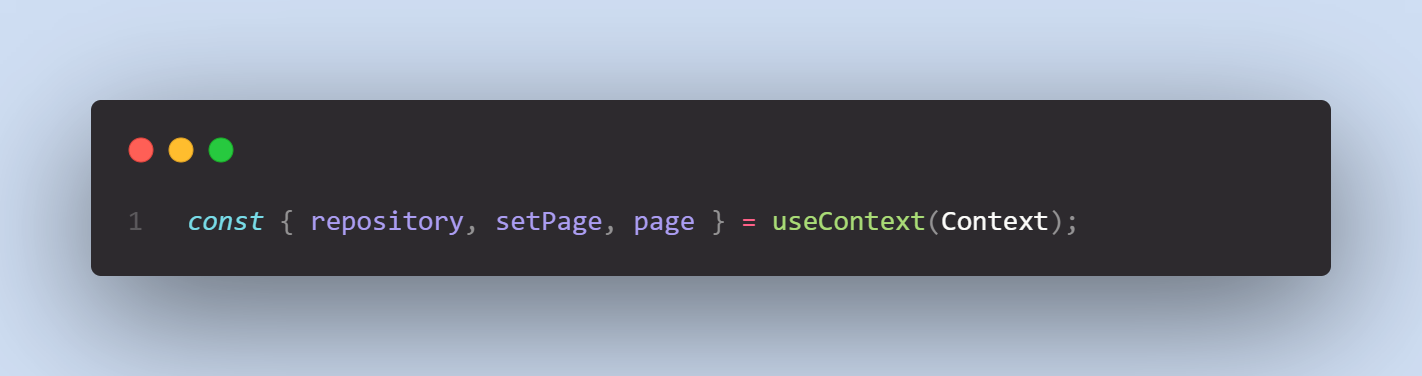
I then separated the context data passed from the ContextProvider component into three variables:
repository: an array of objects retrieved from the GitHub API.setPage: a function for changing the current page number.page: the current page number.
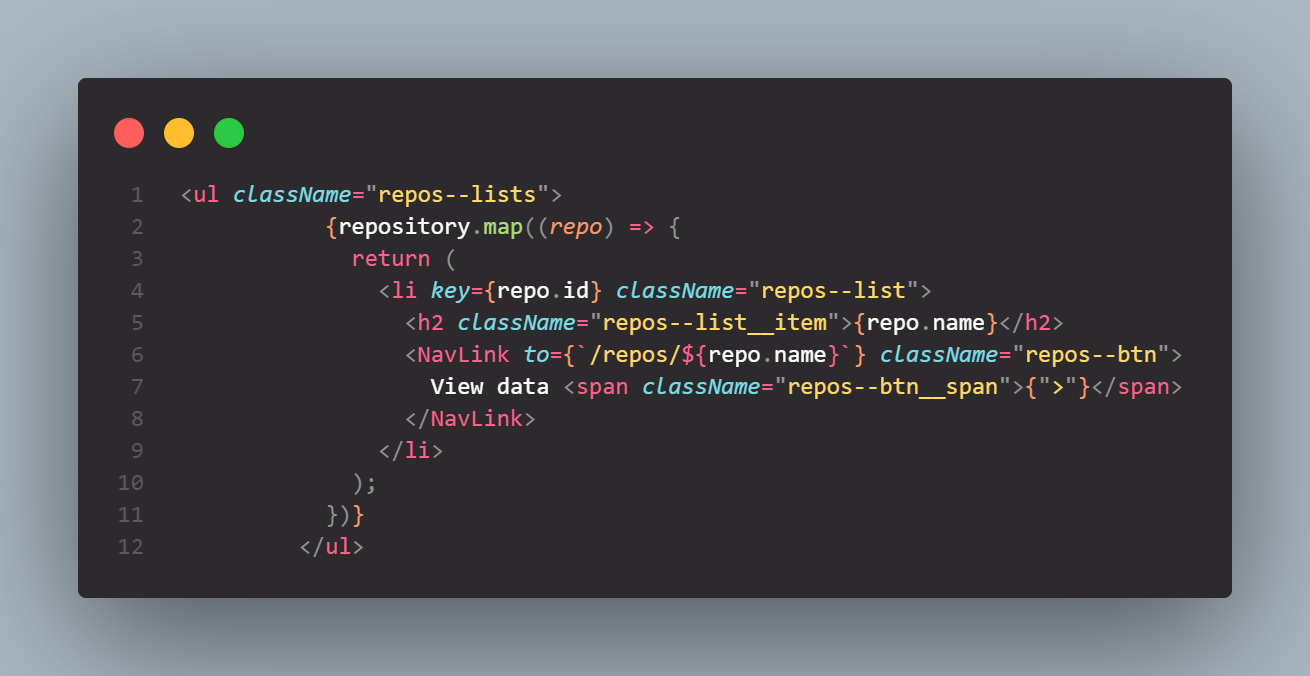
To show my GitHub repositories in a list on the webpage, I created an unordered list element ul, then used the map() function to loop over the repository data that was fetched from the GitHub API. The repository data is an array of objects, each representing a repository. I then created a list item element li for each repository object, with the unique id of the repository object set as the key. Inside the list item element, I added an h2 element with the repository's name as its text content. To allow users to navigate to a separate page where more detailed repository data is displayed, I added a NavLink component from react-router-dom. The to prop of the NavLink component is set dynamically using the repository's name as a parameter to create a dynamic URL path.
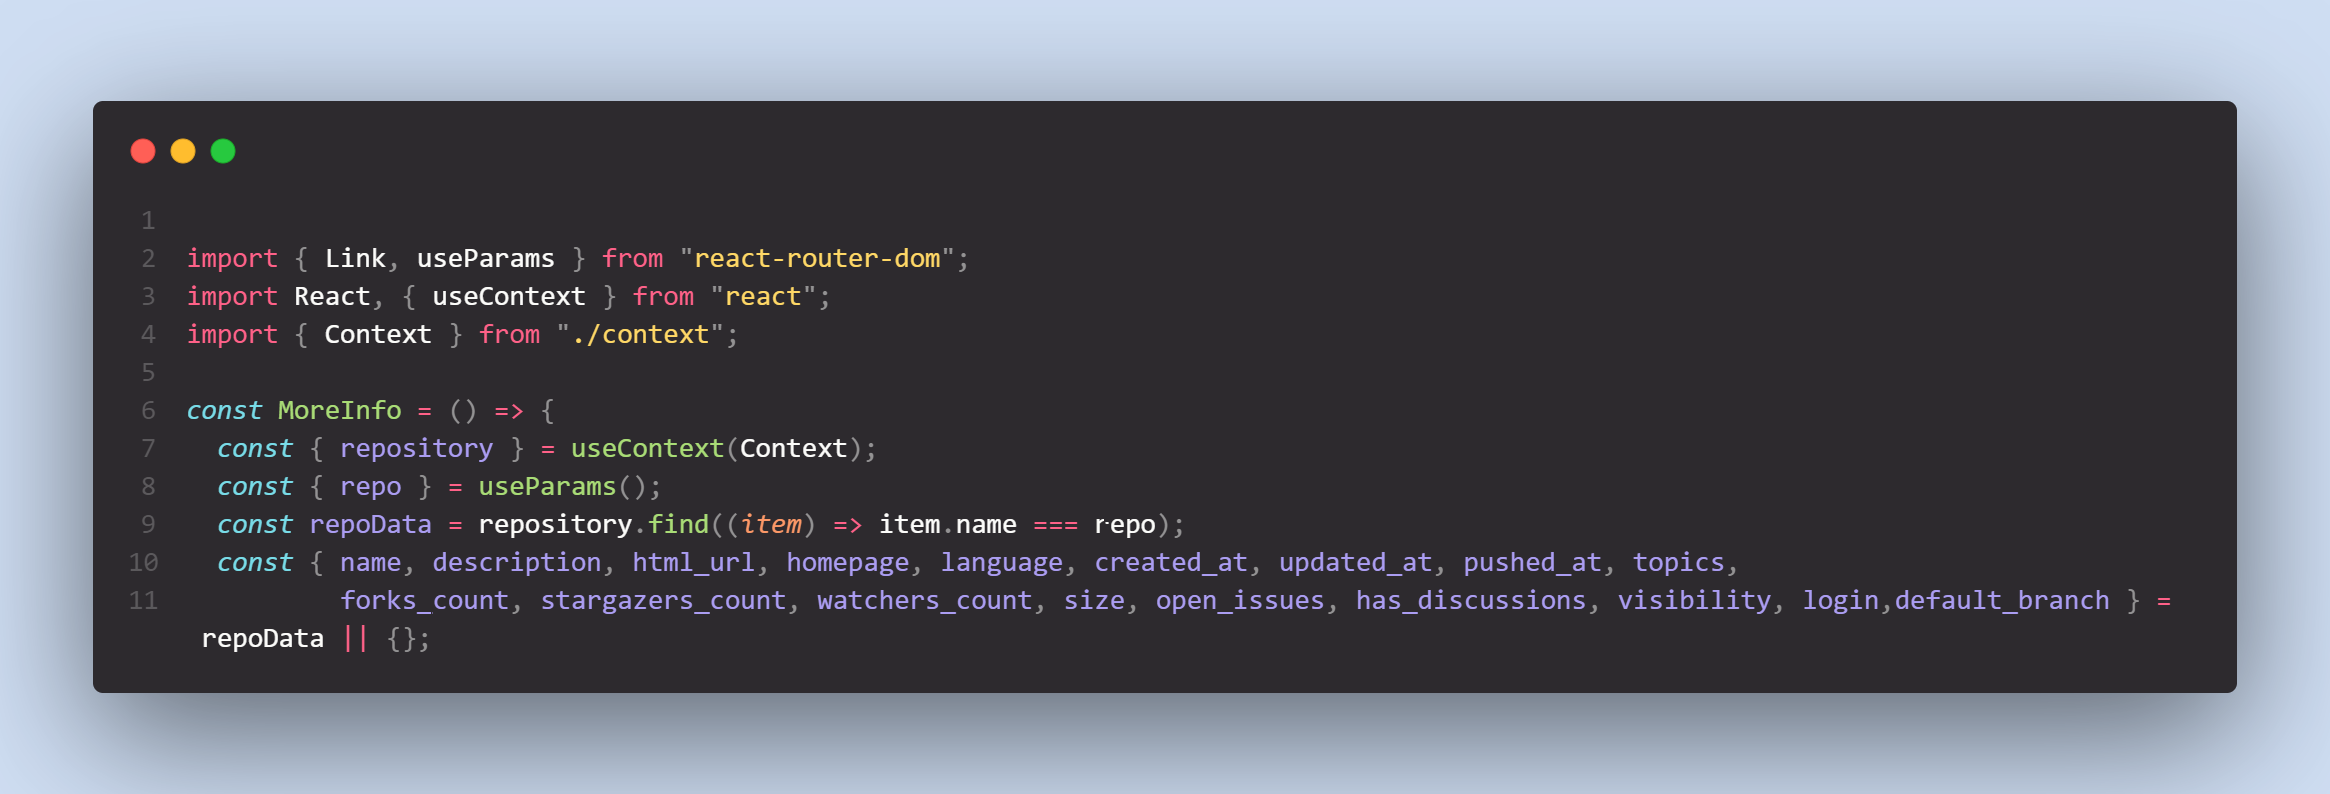
I created a new component called moreInfo to show more detailed information about a selected repository. I used the useContext hook from React to access the context data provided by the ContextProvider component. I retrieved the repository data from the context data by calling the repository property. I used the useParams hook from react-router-dom library to dynamically obtain the name of the selected repository from the URL. This was done by destructuring the repo variable from the object returned by the useParams() function. The value of the repo variable is the dynamic segment of the URL that represents the repository name.
Next, I created a variable called repoData and set it to the repository object from the repository context data with a name that matches the repository name from the URL (repo). I destructured the repoData object to extract individual properties from the repository object and assign them to variables with corresponding names. In cases where no repoData was found, I assigned an empty object to the variables.
Pagination
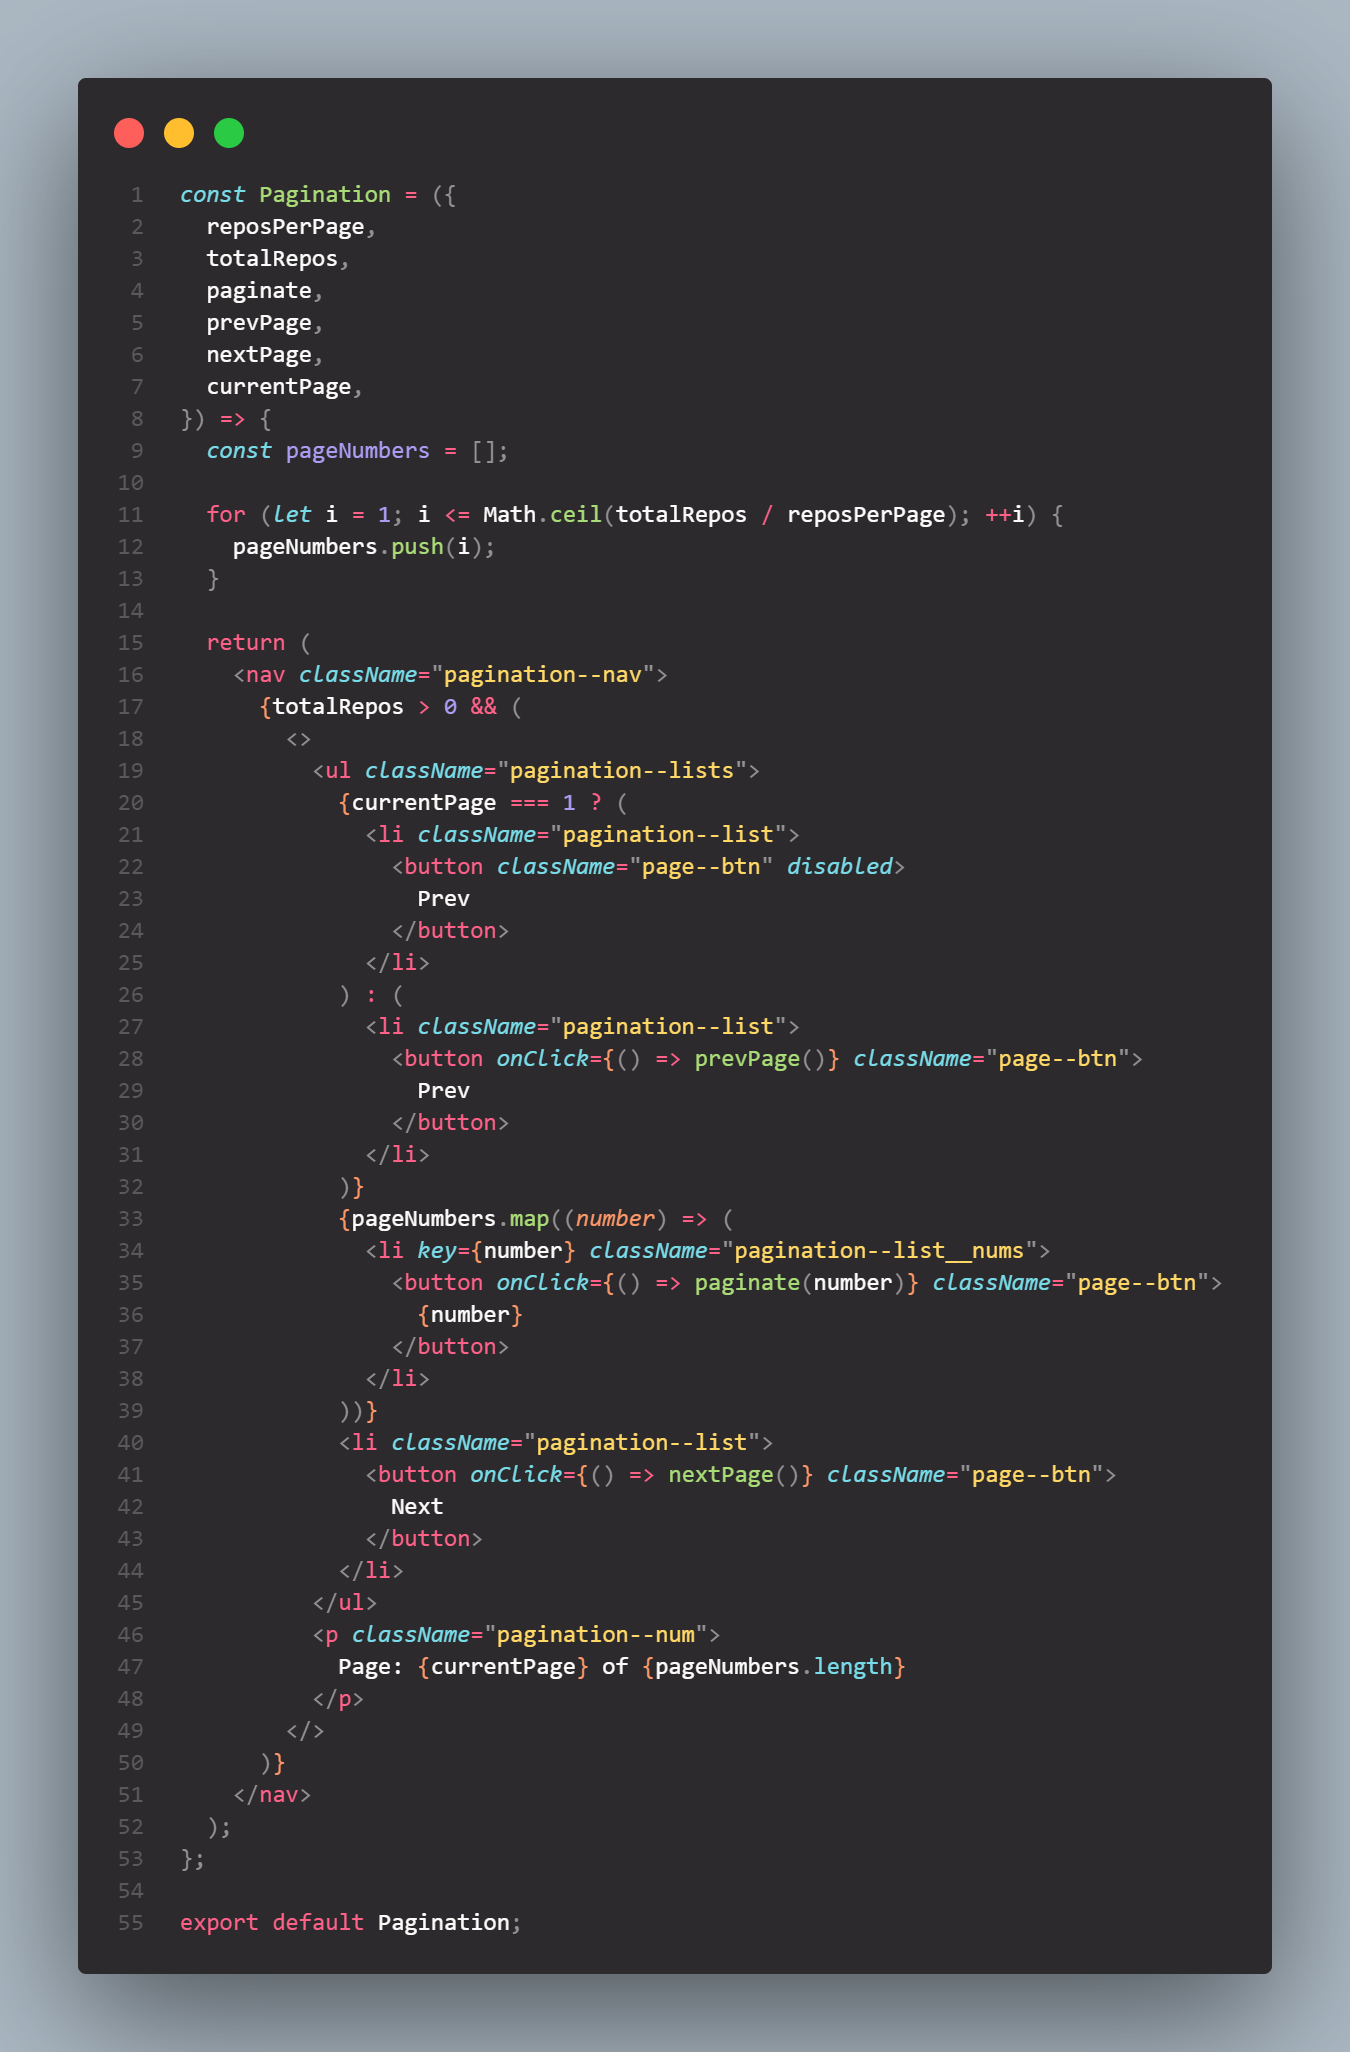
I implemented a pagination feature to allow users to navigate between pages of results and also make the repository list more manageable. To achieve this, I added Prev and Next buttons, as well as Page Count text, which shows the current page as well as the total number of pages.
Advanced Feature (holiday challenge)
For the holiday challenge, I added a new feature to the app that allows users to search for GitHub repositories by entering a valid GitHub username. To implement this feature, I created a new component called UserRepo in another file searchRepo.jsx. This component will be displayed when the user navigates to the new route. In the SearchRepo component, I added a form with a single input field for the user to enter their desired GitHub username.
I decided to use a custom hook because we recently learned that in school and I wanted to practice it with this project. The hook is used to handle user input and manage the state of the form in the component. The useForm hook takes an initial value as an argument, which represents the initial state of the form fields which is set to an empty string. I then used the useState hook to create a state variable called inputs and set its value to be the initial argument. Then I defined the following functions inside the useForm hook:
updateForm: This function is used to update theinputsstate variable with the entered value from the user. It takes input from the user and then callssetInputsfunction with the current state of inputs and the new value to update the state.resetForm: The function sets theinputsstate variable to the initial state.
The hook returns an object containing the three functions: inputs, updateForm, and resetForm. This allows any component that uses this hook to have access to these functions and states for form handling.
After this, I imported the useForm hook into the UserRepo component. Then destructured the returned objects from the custom useform hook to the name github and an initial value of an empty string.
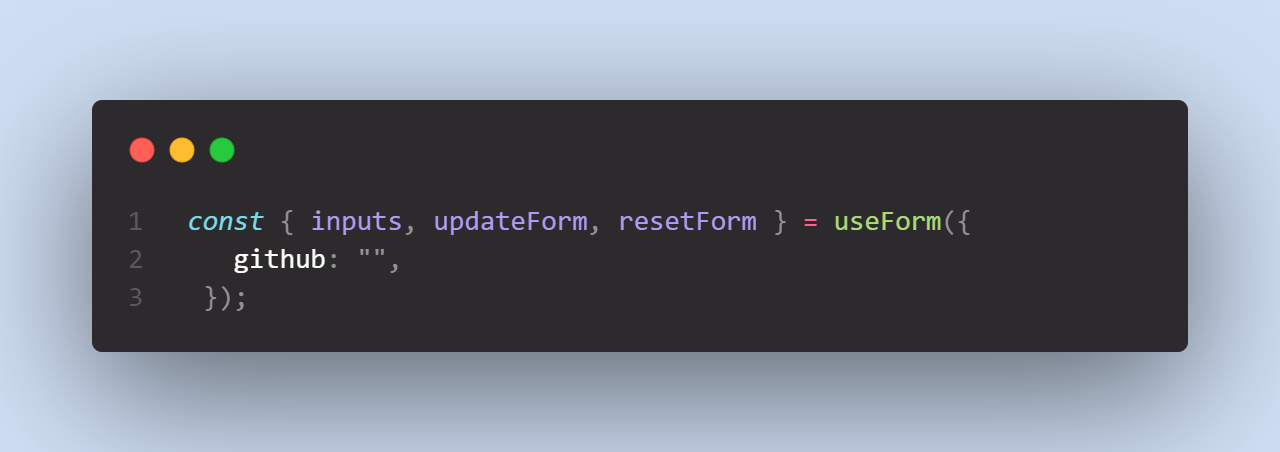
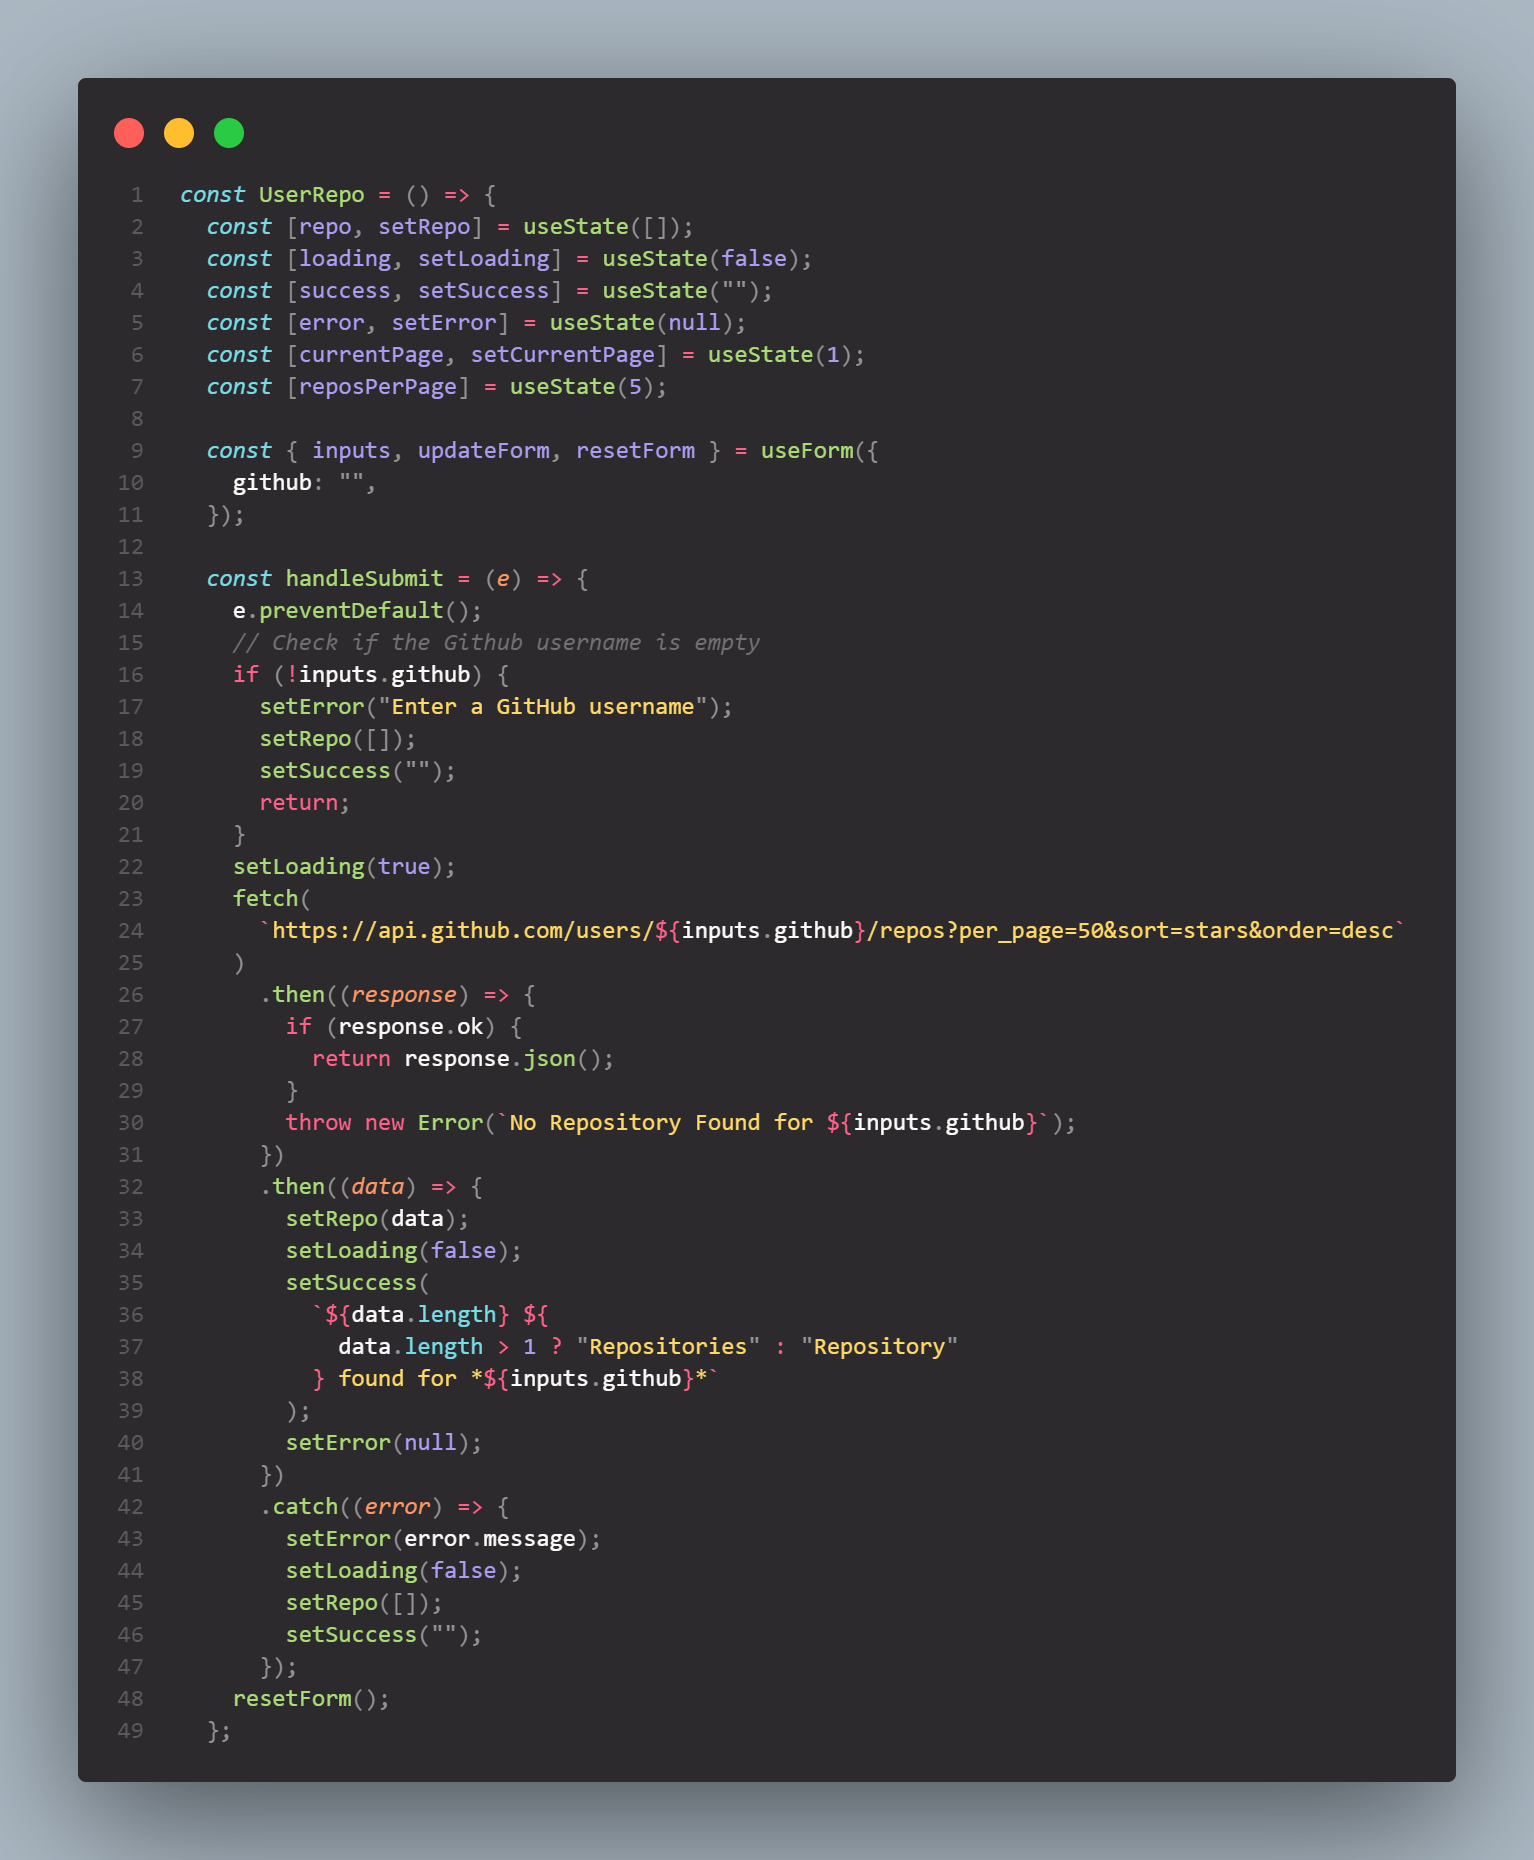
I used useState hook to manage the component's state and defined a function called handleSubmit inside the userRepo. When the form is submitted, the handleSubmit function is called. It first prevents the default form action of reloading the page and then checks if the GitHub username input is empty. If it is, an error message is set, and the user state is cleared. Otherwise it sets the loading state to true to indicate that data is been fetched. A fetch request is then made to the GitHub API for the entered user's repositories, using the inputs.github value from the form. The query parameter per_page is set to 50 to retrieve up to 50 repositories at a time and sorts them by stars in descending order.
If the fetch request is successful, the user state is set to the fetched data, and the loading state is set to false, indicating that data was fetched. If the fetch request fails, the error state is updated with an error message, the loading state is set to false, and the user state is reset to an empty array.
The form is then reset by calling the rsetForm function from the useForm hook. This clears the input field, allowing the user to enter a new GitHub username and search for the repository.
Conclusion
I hope this article was able to share my experience and hard work in creating this project from beginning to end. Feel free to check the GitHub repository for every code detail.
Thank you for sticking with me until the end; I hope you enjoyed it.


